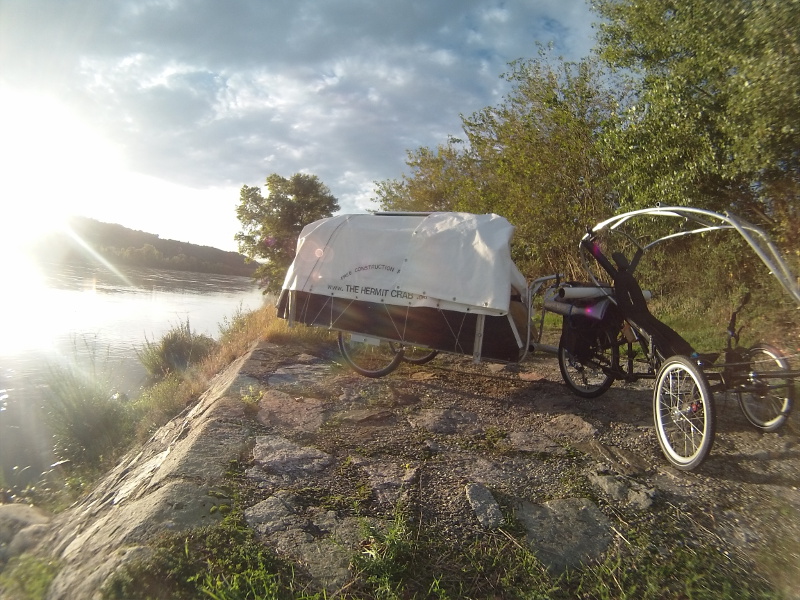
The Crabavan
This trailer can be made by anyone. You don't need a degree, you don't need alien technology. You need common sense and basic tools you can find in any home. This page will document the building process so that you can stand on my shoulders and build something even more awesome. But wait, pictures!
Fun Facts
Time working on project: One year
Total price: $1700
Weight: 55kg (121 lbs)
Dimensions: 1m (width) x 2m (length) x 1.3m (total height). This means 39 inches (width) x 79 inches (length) x 51 inches (height).
Materials: Aluminum (70%), plywood (15%), stainless steel (5%), acrylic glass (5%), heavy duty truck tarp (5%)
Insulation: None. I intend to migrate rather than freezing my ass off. Next version will be insulated, though.
Weatherproof: Absolutely. Has stayed dry through many storms.
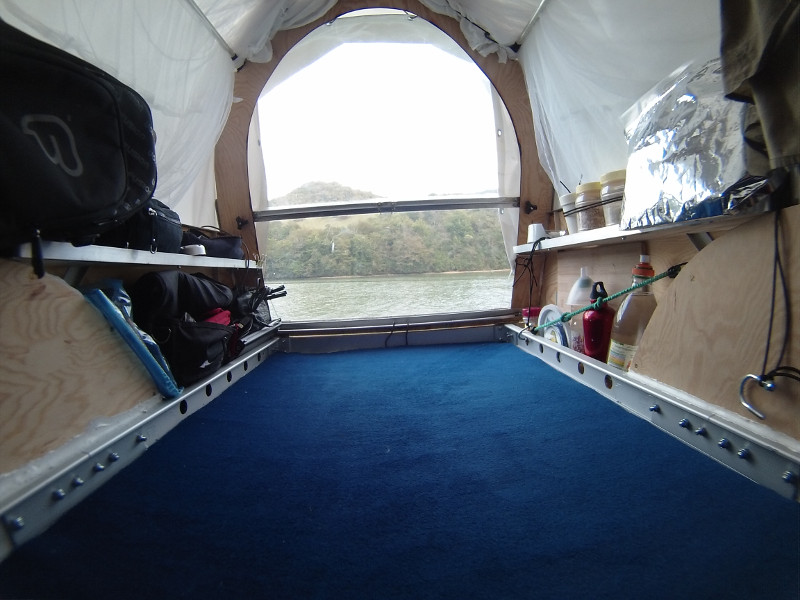
Comfortable? Very much, thank you. The inside carpet space is 2m (79 inches) long, 70cm (28 inches) wide, and 1m (39 inches) tall, making me be able to comfortably sit up straight.
Theft: The Crab can be locked, making it almost impossible to steal, and difficult to break into. You'd need a big knife to tear through the truck tarp, or cable cutters to cut the steel cables.
Legality: The law doesn't regulate non-motored vehicles. Yay!
Electricity: Has dynamo generator and a solar panel.
Tools needed
These are the most ordinary tools you can find in any workshop.

- An electric drill
- A jig saw (for cutting wood and acrylic panels)
- A hacksaw (for cutting aluminum rods)
- A screw driver
- A nut driver / socket wrench
- A silicone gun (to make some joints waterproof)
- A metal file (to smooth some edges)
- Sandpaper (to smoothen plywood panels)
- A big paintbrush (to apply weatherproofing on wood panels)
Main Frame
After scratching my head for ages as to how I would make the lightest structure possible that would well support my weight, I found out that professionals were already making and selling exactly what I needed. The main frame I used was one that comes from
Bikes at Work . They sell bicycle trailers that are made to support 140kg (300 lbs) and happen to be the exact width to sleep in comfortably and store some stuff around you.

Here is the trailer I bought from them was the 96AW. It takes a big worry off to know that the supporting structure won't fail on you in the middle of the desert! Their trailer helped me tremendously, however, if for any reason you can't choose that option, it's quite a simple aluminum construction using two main L-shaped bars, and many round hollow cross-beams. The most crucial part is the hinge: you'd have to be creative to replace that. I did it for The Hermit Cart, and it took some trial and error.

I changed only two things to the supporting structure. This trailer is perfect as it is for the road, but I wanted to make it more off-road compatible so I would have the option to pull it by hand across fields or in the forest. So I replaced the wheels and their axle by standard 24 inch bicycle wheels on two stainless steel axles. It was a lot of work and required to drill through stainless steel, so if you don't intend to use it off road, it's not necessary. Also, Bikes at Work would happily sell slightly bigger wheels that work on the same axles, you just have to ask.
The second thing I changed was the length. I simply cut one of the sections by hand with the hacksaw (only took a few minutes) to make the total length 2 meters (79 inches) instead of 2.4 meters (96 inches). Note: this photo shows the trailer as it was with the original 16-inch wheels.
Make the indoor space as wide as the wheel axle
This is about optimizing space: making as much usable space without making the vehicle any wider. This means using the space over and around the wheels, instead of letting the wheels stick out as they do in the original trailer. You can see on the photo above that there is a metal sheet about 10cm (4 inches) wide extending on both sides and going over the wheels. This is a 1mm thick aluminum sheet, easy to cut with a jigsaw, and easy to bend. To support it, I replaced some of the 82cm (32 inch) bars going across by 1-meter bars. This added the 10cm (4 inch) surplus on each side onto which I drilled-and-bolted the aluminum sheet. It makes great extra storage space on the sides without making the trailer any wider.
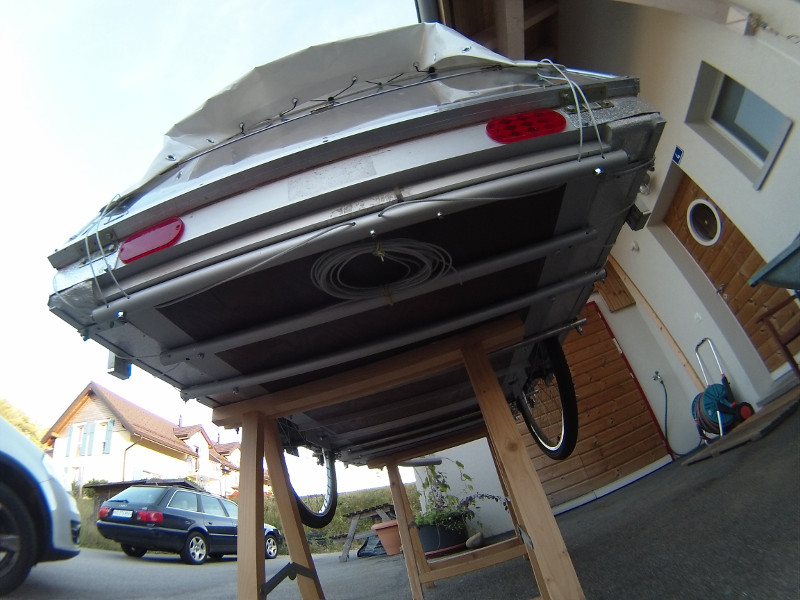
These are the new standard 24 inch bicycle wheels I mounted. Notice the shiny bar closest to us, and the shiny bar on the other side of the wheels: these are the stainless steel axles. Standard bicycle wheels need to be attached on both sides of the axle, so I couldn't just make a simple axle in the middle. These axels connect to two more stainless steel bars (photo: the shiney square bar closest to us), making a square frame that goes around both wheels, supporting the outsides. It's the only part I made of stainless steel, because it's supporting all the weight.
Drilling through Stainless Steel
This square frame supporting the outside of the wheels is also drilled-and-bolted, so it required me to drill stainless steel. It's not hard as long as you follow a few tips. First of all, cobalt drills work best and last a long time. In the hardware store, ask for cobalt drills made for stainless steel. They're more expensive, so buy only the diameter corresponding to the bolts you'll use. Second, mark the place you will drill with a center punch and hammer. This will prevent the drill bit from sliding all around. Making a pilot hole can help as well (a much smaller hole with a smaller drill bit to "pilot" the bigger one), but it's not necessarily necessary. Finally, use the cobalt drill with quite a lot of pressure, at low speed, otherwise the stainless steel can "work harden": become harder and harder and all purple, until it is almost impossible to drill through.

Attaching the Wheels
Hitching the wheels to this structure wasn't complicated. All I did was buy a thick aluminum one meter long (3.3 feet) angle bar, cut it into 4 even parts (you can see all four on both of these pictures), drilled a hole through the very middle big enough for the wheel axle to go through, cut through to these holes with the hacksaw (making the upside down U-shape), and attached these 4 pieces to the frame with bolt and nut. You can see almost every part of this process in the above two pictures.

The Floor
I did this relatively late in the process, I almost did it at the end. The Bikes at Work trailer is made to accept a 6mm thick (1/4 inch) plywood panels 60.5cm wide (25.5 inches). Loosen the bolts, slide the panel in there, and tighten the bolts again. Before putting any plywood though, make sure you weatherproof the outside with any kind of wood sealant (instructions below).
Weatherproof the Wood
You're going to do this for any wooden surface turned towards the outside. You should only weatherproof one side of the wood panel, because sealing both sides can trap air bubbles between both layers of weatherproofing that may make it crack when the sun heats it up. However, the inside can be treated with linseed oil (or any other water-repellent oil) to make it resist water a little better without making it airtight. Here's how to weathproof the outside:
Start by briefly sanding the wood with relatively fine sandpaper. Don't worry about details. Apply a layer of wood sealant (any kind you find in the store will do, don't waste your money), and let it dry for 24 hours. Now do these three steps two more times, so that you have a total of three layers of wood sealant. Now you're protected!

Brakes
Brakes on the trailer are useless if you're only intending to pull it by bike, but hand-pulled, brakes can be a lifesaver in a downhill. The brakes were easier to mount than I expected. I bought the simplest caliper brakes for around 6$ each. These brakes only need to be attached at one point (the middle axis you can see on the picture), so I drilled through the front stainless steel axle (with a cobalt drill bit) and just mounted them there. Very easy. The brake cable then connects to the handles at the front, we'll get to that later.
Upper Structure
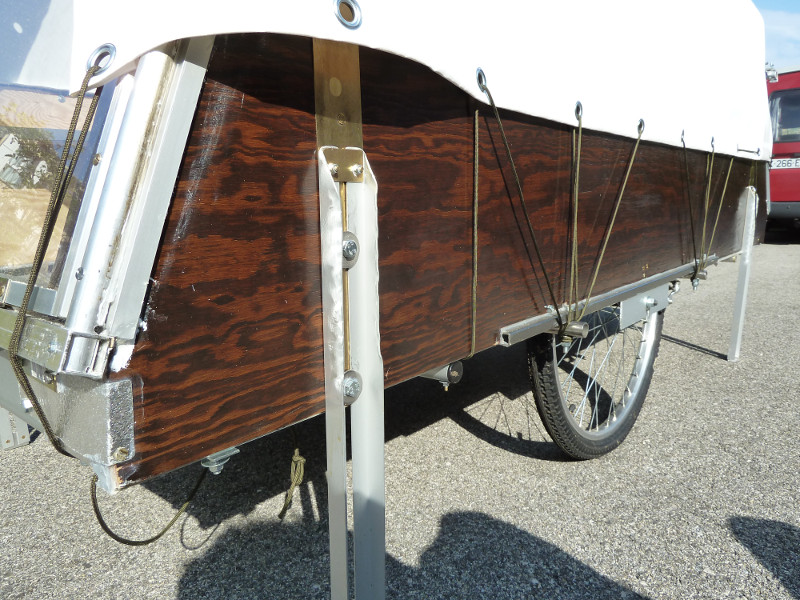
To build the walls and the roof on top of this frame, I followed a very simple principle. The whole structure is basically plywood sandwiched between an aluminum skeleton. The aluminum is held together, as well as held to the wood, by simple nuts and bolts.
Left: Inside view of the acrylic window (the back of the Crab). Right: Inside view of the front entrance, with the tarp opened up

1st Ingredient: Plywood
- Two plywood panels, dimensions of around 40cm (15 inches) x 2m (79 inches), and 4mm (5/32 inches) thickness. These will be the side walls.
- A single plywood panel of dimension 1m (40 inches) x 1.03m (41 inches), also 4mm (5/32 inches) thick. This will be the back panel, in which we will cut out the window, seen on the first picture. The only purpose of this frame is to allow the window to open, and seal the rain out when it's closed.
- A plywood panel of dimension 1m (40 inches) x 40cm (15 inches), also 4mm (5/32 inches) thick. This will be the front panel, seen on the second picture.
- Extra plywood (you'll probably have enough leftover scraps) to make the sides of the wheel fenders, seen on both pictures. This can also easily be made out of aluminum sheets.
- Shelves can be made from leftover plywood, nice way to recycle that stuff.

2nd Ingredient: Aluminum L-Bars
- Four L-bars, 2m long (80 inches). Quite solid, because these will be the outer frame of the plywood walls.
- Three L-bars, 1m long (40 inches). Quite solid, these will the the frame supporting the top and bottom of the front panel (seen on picture 2), as well as the bottom of the back panel (seen on picture 1)
- About 8m (26 feet) worth of thinner angle bars, these will be cut and used as reinforcement against the inside of the walls. As you can see on both pictures, there are two vertical bars on each wall, and two angle at 45° around the wheels. There's also one on the outside of each corner of the Crab. That makes a total of 8 bars inside, and 4 outside. Each bar being around 50cm (20 inches), that makes a total of 6 meters (20 feet) worth of angle bars. 8 meters (26 feet) is to be extra sure and to have leftovers for later.
- Around 5m (16 feet) worth of even thinner angle bars, these will be the frame around and through the acrylic window, seen on picture 1.
- Again, leftover angle bars can be used to make shelves.

3rd Ingredient: Aluminum Pipes
All aluminum pipes used to make the upper structure are 2cm diameter (3/4 inches). The rim should be pretty thick, like the one in the picture. Here are the lengths:
- Two pipes with a length of 2.5 meters (98 inches) to make the arcs supporting the beams. If you can't find pipes that long in the stores, you can go for two pipes half the length and connect them togehter, but it'll be a little more complicated.
- About 8m (26 feet) worth of pipes for the ceiling beams. There are 5 ceiling beams, ranging from 1.2 meters (4 feet) to about 1.5 meters (5 feet), so 8 meters (26 feet) is a safe bet.

4th Ingredient: Nuts & Bolts
- At least 250 locknuts (the ones with nylon inserts to prevent them from coming loose with vibration). The standard ones used in the Crab are sized M4. This must be a European size, but basically I took the smallest nylon-insert locknuts they had in the hardware store.
- As many bolts as locknuts. The length I used the most was 2cm (3/4 inch), and I also used quite a few 1cm (0.4 inches), and some 3cm (1.18 inches) bolts.

5th Ingredient: Plexiglass Panels
This is the panel used to make the window. Dimensions are 1 x 1 meter (40 x 40 inches), thickness is 4 mm (1/8th inch)

6th Ingredient: Rubber Washers
Necessary to bolt the acrylic panels to the metal frame. Without them, as soon as the sun shines, the metal expands more than the acrylic, making it crack. Get at least 20, they'll come in handy.

7th Ingredient: Hinges
A total of 14 quite small simple hinges, similar to the one in the picture. Four are for attaching the inclined front wall to the frame, four are for attaching the inclined back wall to the frame, three are for the window's bottom articulation and three are for the window's middle articulation. It's not necessary to have a window that can full open, so if you choose not to, you can knock three hinges off your list.

8th Ingredient: Liquid Thread Locker
This isn't absolutely necessary, but I love this stuff. It acts the same way as the nylon-inserts found in the locknuts mentioned earlier. We use these locknuts wherever we can, but there are some situations where for some reason, whatever you're screwing doesn't have these nylon inserts and you don't want it to slip out with vibration. Liquid thread locker does the job (don't get the heavy duty permanent one, get the lighter duty one). But don't use liquid thread locker where you could use a nylon-insert locknut: locknuts are much cheaper.
Making the Arcs
The arcs are simply 2.5 meter (98 inch) pipes bent into a nice arc that should have a bottom width of 1 meter (40 inches). The last 40cm (16 inches) at both ends should be straight and parallel because they will frame the rectangular plywood panel we talked about earlier. Here's a nice method for bending a pipe relatively neatly without any tools in five easy steps.

Step 1: Tape the End
Tape one end of the pipe tightly shut.

Step 2: Fill it up!
Use a funnel to fill the pipe with sand if you live by the beach, or with salt if you live in the mountains (the cheap kind they use to melt snow). Pack it in as tight as you can, you can even hammer it down with a peg. This will prevent the pipe from kinking and breaking when you'll start the bending process.

Step 3: Tape the other end
Once it is very tight, tape the other end shut.

Step 4: The bending
Bend it with anything you have. I have an old bicycle wheel and two feet. Make sure you don't bend it against anything too angled. It doesn't take a lot of strength, but feel free to use a friend or a neighbor. (I took this photo with my mouth)

Step 5: Empty it
Once your are satisfied with the shape, take the tape off and pour the salt back in the bag or pour the sand back on the beach for future use. And please don't criticize the niceness of my arc.
Fixing the Arc to the bottom frame
We're going to turn these arcs into walls before attaching them to the frame. This means bolting on horizontal aluminum angle bars as well as the plywood panels.
Left: The front wall and arc, hinged on to the bottom frame. Right: The back arc, hinged on to the bottom frame


